Calling Microsoft Flow (Power Automate) from your Application
On 5 minutes
Microsoft flow has become an integral part of Office 365. As a service that helps us create automated workflows between apps and services to synchronize files, get notifications, collect data and more, knowing how to call Flow from any application is very important to any developer.
To illustrate how to call a Flow from our app, we will mimic sending an email. Normally for such a task, we could send the message to our mail server directly from the app, but we will use flow in the post. The advantage here is that, we can perform some other actions in the flow either before we send the mail or afterwards.
An email will have the address, subject and body. How would the flow know we are sending these parameters? What will be the REST endpoint? Flow provides the Request action for this. We will specify the JSON schema we are sending, and it will provide us with the URI endpoint as well.
For our request, the body will look like this:
{
    "emailaddress":"string",
    "subject": "string",
    "message": "string"
}
Step 1:
We can then generate a schema from this. You can use JSON schema generator like jsonschema.net.
{
    "type": "object",
    "properties": {
        "emailaddress": {
            "type": "string"
        },
        "subject": {
            "type": "string"
        },
        "message": {
            "type": "string"
        }
    }
}
The only required keywords for JSON sent to a Flow are type and properties.
Step 2:
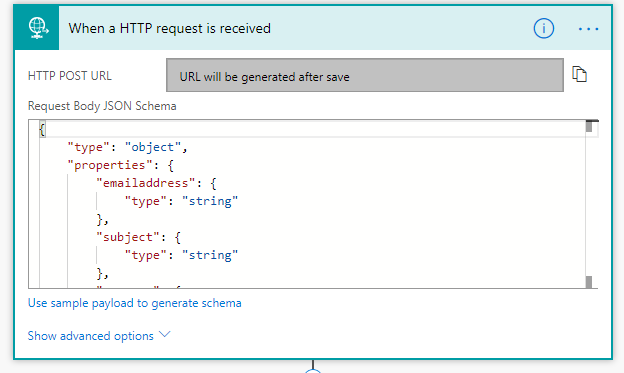
Go to your flow page, create a blank flow. When prompted to search for triggers, choose When a HTTP Request is received.
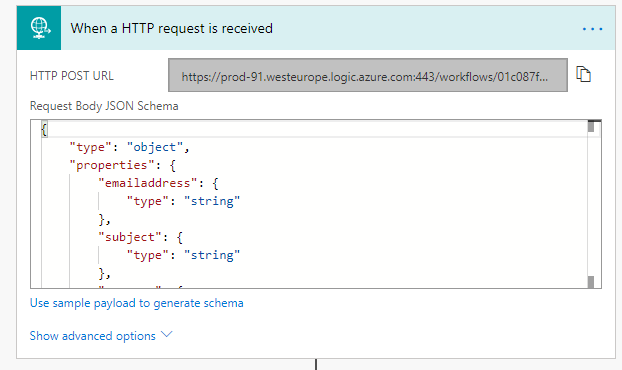
Paste your JSON in the Request Body Schema Format field. After you save the flow, you will get the API endpoint.
Step 3:
Click on the + New Step and add Office 365 Outlook – send an email
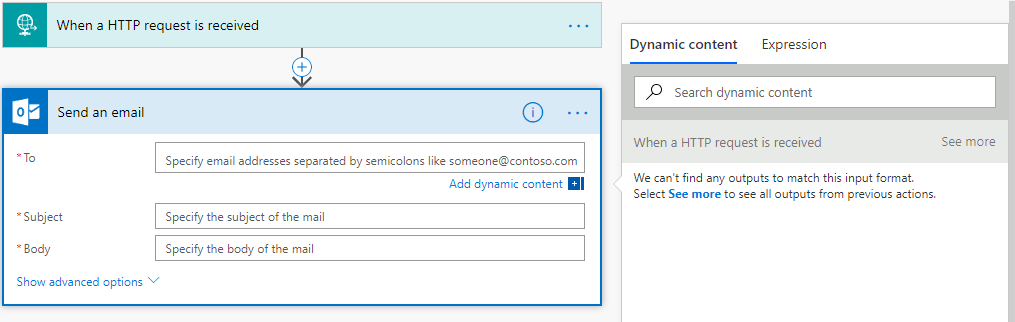
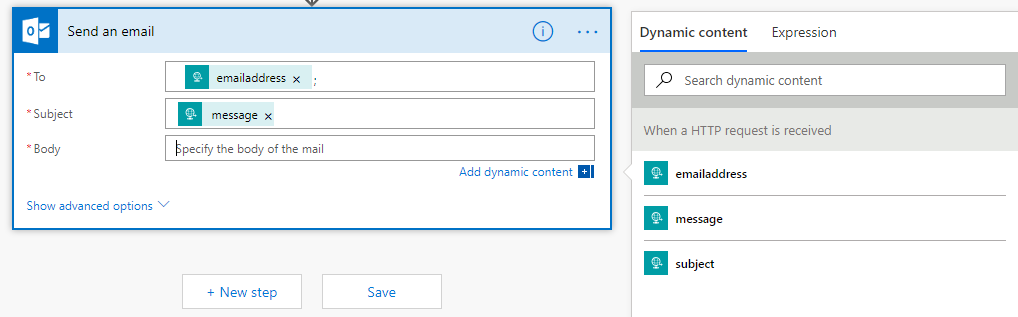
Select a field and click add dynamic content. Then click the See more. You will see the JSON parameters from the schema you supplied. Add appropriate parameters to their fields.
Step 4:

Let’s check to see if the email was sent. We will add Response action to check the status of the email request. 200 indicates it was successful.
We can then add more actions.
Note: Response actions will not work when added to workflows triggered by recurrence.
Security
Anybody with the Flow URL can call it. Your best bet at securing it is to keep the URL safe. Alternative you could use any of the following methods to secure it.
Method 1: Create your own security token
For this method, you will supply a security token as part of your Flow Trigger URL
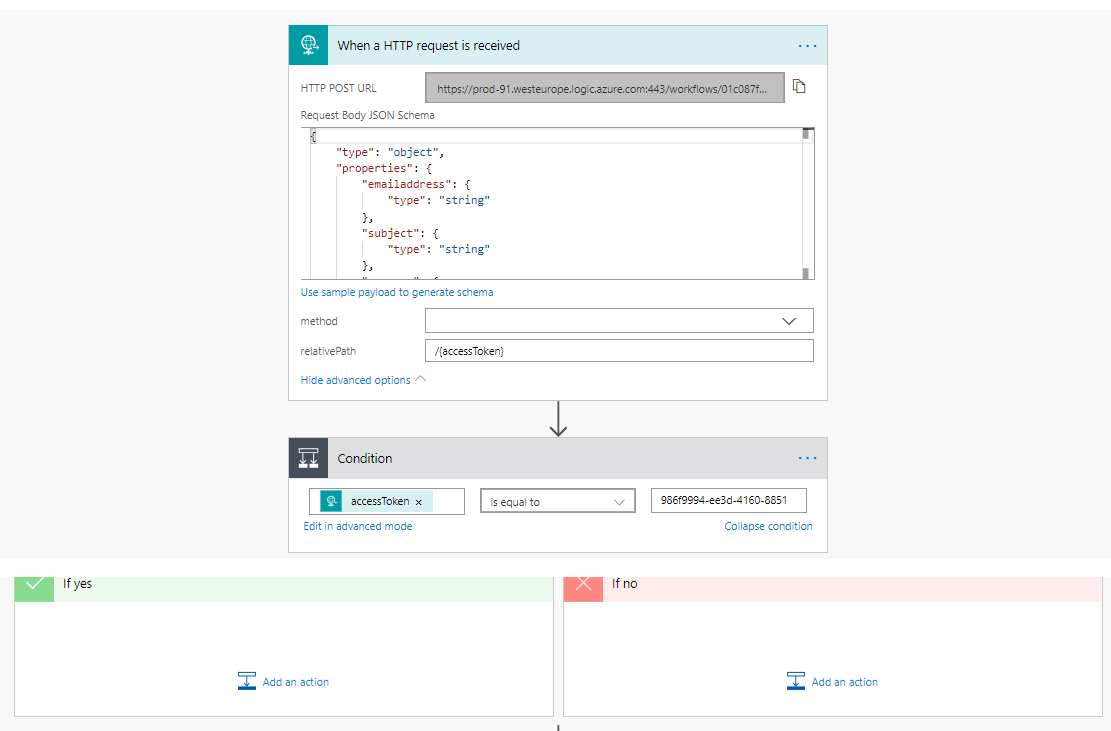
This will change how you will call the Flow. The URL for the trigger will now contain the slug /{accessToken}/. You will replace the {accessToken} in the URL with your token
Method 2: Check the Header
You can use the Data Operations – Parse action to parse the Header information received by the When a HTTP Request is Received Action is called.
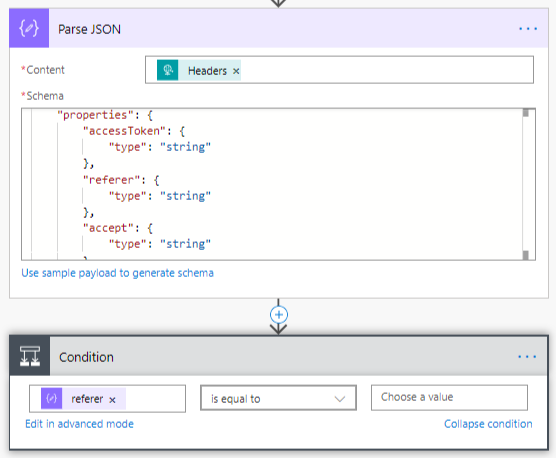
You can use Control Terminate and Conditions actions to validate that a particular header information meets your requirements.
Method 3: Regenerate the Trigger URL
If it is compromised, you can regenerate a new HTTP endpoint URL by copying the existing flow, saving it, and you will get a new URL.
Final Words
You can test you flow by using Postman. An important thing to note is that, the Flow HTTP endpoint doesn’t return anything if you don’t explicitly do so. If you get a response, you can assume it’s an error.
Other posts you might be interested in
- Which User Context does Microsoft Power Automate Run?
- Making Office 365 Work for you: Monitoring ATMs
- Using OData Query to Filter SharePoint List Items by Lookup Fields in Microsoft Flow (Power Automate)
- Calling REST API with Microsoft Flow (Power Automate)
- Assigning Microsoft Flow (Power Automate) approvals to Office 365 Groups